How to Test a Golf Cart Battery Charger: The Ultimate Troubleshooting Guide
You are ready for a day on the golf course. You jump into your cart and turn the key. Nothing happens. The silence is frustrating. You plugged it in all night. You expected a full charge. Now you are stuck in the garage. Is the problem the batteries? Or is it the charger itself?
This is a common issue for many golf cart owners. You need to know if you should buy new batteries or a new charger. Learning how to test a golf cart battery charger is a valuable skill. It can save you a lot of time and money. You do not want to replace expensive batteries if the charger is the only problem.
This guide will help you find the answer. We will look at simple checks you can do with your eyes. We will also use tools to look deeper. We will cover how to check the voltage output and the internal parts. We will explain everything in simple words. Let’s get your cart moving again.
Why Won’t My Golf Cart Charge?
A golf cart system relies on a loop of energy. The charger takes AC power from your wall. It converts this power into DC power. The battery bank stores this DC power. If one part of this loop breaks then the cart will not move.
Sometimes the issue is not the charger at all. It could be the wall outlet. It could be a loose wire in the cart. But often the charger is the culprit. Chargers have internal parts that can wear out. Capacitors can fail. Diodes can stop working. The transformer might burn out.
You need to act like a detective. You have to test each part one by one. This is the best way to find the truth. We will start with the easiest tests first. Then we will move to the harder ones.
Tools You Need for the Job
You cannot see electricity with your eyes. You need special tools to see what is happening inside the wires. You do not need a whole shop of tools. You just need a few basic items.
The Digital Multimeter
This is the most important tool. A multimeter measures voltage and resistance. It tells you if power is flowing. It also tells you if a wire is broken. You can buy one at any hardware store. It does not have to be expensive.
Safety Gear
Batteries contain acid and electricity. You must stay safe. Wear safety glasses to protect your eyes. Wear gloves to protect your hands. Always take off metal jewelry like rings or watches. Metal can cause a spark if it touches the battery terminals.
Hydrometer (Optional)
This tool is for lead-acid batteries. It tests the water inside the battery cells. It tells you the specific gravity of the electrolyte. This helps you know if a battery cell is bad. It is a good tool to have for total maintenance.
Step 1: Visual Inspection and Wall Power
Before you open your toolbox you should use your eyes. Look at the simple things first. Many charging problems are just loose connections.
Check the wall outlet where you plug in the charger. Plug a lamp or a radio into that same outlet. Does the lamp turn on? If it does not then your outlet is the problem. You might have a tripped circuit breaker in your house.
Next you should look at the charger cords. Look at the cord that goes into the wall. Look at the thick cord that goes to the cart. Do you see any cuts or fraying? A damaged cord can stop the flow of power. It can also be a fire hazard.
Check the DC plug that connects to the cart. Look inside the plug head. Are the metal pins dirty or bent? Corrosion can block electricity. The pins must be clean and straight. If your plug is broken or the unit is too old you might need a replacement. You can find high-quality golf cart chargers that come with fresh cables and plugs.
Step 2: The Battery Bank “Wake Up” Test
This is a step that many people miss. Most modern chargers are automatic. They are smart machines. They need to sense some voltage from the golf cart batteries to turn on. This is a safety feature. It prevents the charger from sparking when you plug it in.
If your batteries are completely dead the charger will not start. It will not even try to charge. The charger thinks it is not connected to anything.
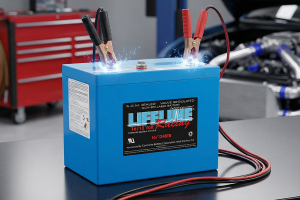
You need to test the voltage of your battery bank. Use your digital multimeter for this. Set the meter to the DC voltage setting. Put the red probe on the main positive post. Put the black probe on the main negative post.
The Minimum Voltage Rule
A 36-volt system usually needs at least 20 to 25 volts to trigger the charger. A 48-volt system usually needs 30 to 35 volts. If your batteries are lower than this the charger will stay off.
In this case the charger is fine. The batteries are just too low. You will need to charge them individually with a standard automotive charger. Once the voltage is up the golf cart charger will work again.
Step 3: Testing Charger Output
If the batteries have voltage and the outlet works then we must test the charger. We need to see if it is pushing out power. This is the main step in learning how to test a golf cart battery charger effectively.
Setting Up the Test
Disconnect the charger from the golf cart. Keep it plugged into the wall. Turn your multimeter to the DC voltage setting. Look for the symbol with a "V" and straight lines. Choose the 200V scale so you can read higher numbers.
Take the charger handle that plugs into the cart. You will see two or three pins inside. You need to touch the multimeter probes to these pins. Usually the red probe goes to the positive pin. The black probe goes to the negative pin.
What the Numbers Mean
You are looking for a specific reading. The voltage on the meter should be higher than the rating of the charger.
For a 36-volt charger: You should see a reading between 36 volts and 45 volts.
For a 48-volt charger: You should see a reading between 48 volts and 60 volts.
If you see zero volts then no power is coming out. If you see very low voltage then the charger is weak. If you need a reliable replacement for an older system the Dual Pro 36 Volt 25 Amp charger is a great choice. It comes with the classic crowfoot connector that many older carts use.
This test tells you if the unit is dead or alive. If you get a strong voltage reading here your charger is likely good. The problem might be inside the cart receptacle.
Step 4: Listening to the Charger
Your ears can tell you a lot about the problem. Golf cart chargers make sounds. These sounds are clues.
The "Click"
When you plug the charger into the cart you should hear a "click" sound. This usually happens after a few seconds. This sound comes from the relay. The relay is a switch. It connects the power to the batteries.
If you do not hear a click the relay might be broken. It could also mean the charger is not getting the "wake up" signal from the batteries.
The "Hum"
After the click you should hear a soft hum. This is the sound of the transformer working. It is a vibration.
Loud Buzzing: If the charger hums very loudly it could be a bad capacitor. It could also be a loose transformer plate.
Silence: If it clicks but stays silent the transformer might be broken.
No Heat: A working charger gets warm. If it runs for hours but stays cold it is not doing any work.
These sounds help you locate the broken part. It guides you on what to fix.
Step 5: Testing Internal Components
Sometimes you have to open the case. You need to look at the parts inside. Unplug the charger from the wall and the cart before you do this. This is very important for safety.
The Fuse Check
Every charger has a fuse. It protects the unit from power surges. Locate the fuse inside the case. It usually looks like a small glass tube or a plastic blade.
Use your multimeter to test it. Set the meter to the "Continuity" setting. This often looks like a sound wave symbol. Touch the probes to both ends of the fuse. If the meter beeps the fuse is good. If there is no sound the fuse is blown. A blown fuse is a cheap and easy fix.
Testing the Capacitor
The capacitor helps the transformer work efficiently. If it fails the charger might hum loudly but not charge well. Capacitors store energy even when unplugged. You must be careful.
Look for a metal can shape. To test it you usually need a meter that measures capacitance. If you do not have that check for physical damage. Is the capacitor swollen? Is it leaking oil? These are signs of failure.
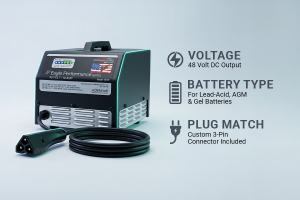
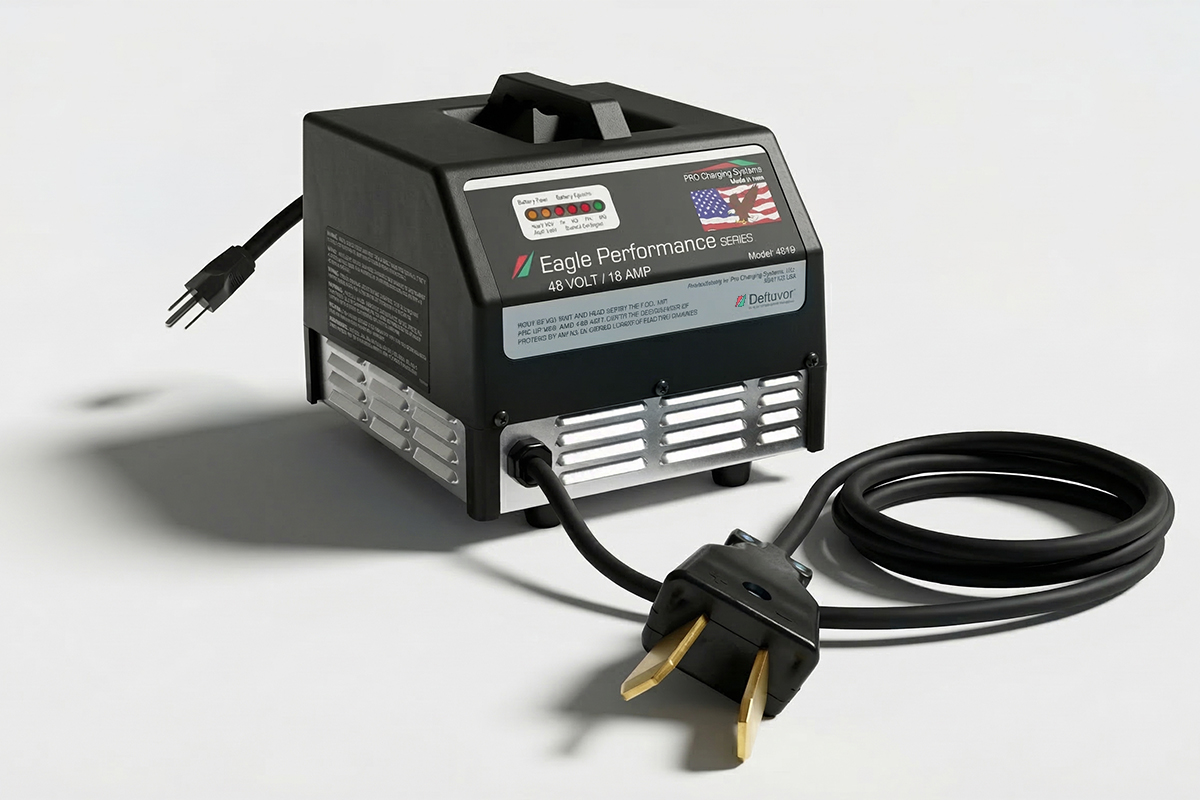
If your 48-volt system needs a robust charger with good internal components consider the Club Car i4818 Dual Pro Charger. It is built to handle tough charging cycles.
Step 6: Troubleshooting by Brand
Different golf cart brands use different charging systems. They have unique plugs and unique quirks. Knowing your brand helps you test better.
Club Car and the OBC
Club Car golf carts have a special computer. It is called the On-Board Computer or OBC. This computer controls the charge. It tells the charger when to turn on and off.
If the OBC fails the charger will not work. The charger might be perfectly fine. But the computer is not telling it to start. You can bypass the OBC to test this. If the charger works with a bypass then the charger is good.
However bypass kits can be tricky. It is often better to get a charger that works with your specific setup. Understanding your golf cart charger 48 volt system is key here.
E-Z-GO and the Reed Switch
Older E-Z-GO carts use a "reed switch" inside the charge receptacle. This is a small safety switch. It stops the cart from driving while plugged in.
This switch often breaks. When it breaks the charger will not turn on. You can test this switch with your multimeter. If you have a modern RXV model you might need a specific unit. The EZGO RXV i4818 Dual Pro provides the right amperage for these newer battery banks.
Yamaha Plug Issues
Yamaha carts often use a 3-pin plug. These plugs are notorious for bad connections. The internal pins can get loose.
Wiggle the handle when it is plugged into the cart. Does the charger turn on and off? If it does the connection is bad. You might need a new DC cord. Or you might need a whole new charger if the port is melted. The Yamaha G29 Drive 3-pin replacement is a popular solution for 2007 and newer models.
Step 7: How to Test Golf Cart Charger with Multimeter (Diode Test)
Diodes act like one-way streets for electricity. They convert the AC power to DC power. They are attached to a metal plate inside the charger. This is called the rectifier.
If a diode blows the charger will not produce full power. It might blow the fuse immediately. To test them use the diode setting on your multimeter.
Touch the probes to the diode. Then switch the probes around. The meter should show a reading in one direction only. If it reads in both directions the diode is bad. If it reads in no direction the diode is open. Both mean the part is broken.
Replacing diodes is possible. But it takes some skill with soldering. For many people buying a new unit is safer.
Step 8: Dealing with the RXV Connector
The E-Z-GO RXV uses a triangle-shaped plug. This is a smart system. It is very sensitive. If the third pin does not make good contact the charger will not start.
Inspect this plug carefully. It collects dirt easily. Clean the contacts with a little contact cleaner. If you still have trouble look for a charger made just for this cart. The RXV EZ-GO i4815 Dual Pro charger is engineered to fit that triangle port perfectly.
Step 9: Resetting the Unit
Sometimes computers just need a reboot. Your charger is similar. It might have encountered an error. It could have overheated. It might need a fresh start.
Many people ask how to reset golf cart charger units properly. The process is simple.
Unplug the charger from the wall.
Unplug the charger from the golf cart.
Wait for about 10 minutes. This lets the internal power drain away.
Some chargers have a small red reset button on the side. Press it if you see one.
Plug the charger into the cart first.
Then plug it into the wall.
This sequence resets the logic board. It might clear the error code.
Step 10: Check the Wiring Continuity
Wires can break inside the insulation. You cannot see the break. But the copper wire inside is snapped. This happens because we wrap the cords tight. We pull them around corners.
Use your multimeter again. Put it on the continuity setting. Put one probe on the pin of the plug. Put the other probe on the connection inside the charger case. You should hear a beep.
Do this for both the positive and negative wires. No beep means a broken wire. A broken wire is an easy fix. You just need to replace the DC cord set.
Common Signs of Battery Failure vs. Charger Failure
It is easy to get confused between a bad battery and a bad charger. Here is a quick cheat sheet.
It is likely the Charger if:
The charger does not click on.
The breaker on the wall trips instantly.
There is zero voltage at the charger plug.
The charger capacitors are leaking or swollen.
It is likely the Batteries if:
The charger turns on but shuts off quickly.
The cart runs for only 10 minutes after a full charge.
The batteries are more than 5 years old.
The battery water plates are exposed.
Understanding these signs helps you avoid buying the wrong part.
When to Repair and When to Replace
You have done all the tests. You know how to test a golf cart battery charger and you found a problem. Now you have a choice. Should you fix it? Or should you toss it?
Repair It
If the problem is a fuse repair it. Fuses are cheap. If the problem is a bad DC plug repair it. Plugs are easy to install. If it is a bad capacitor and you are handy fix it. These are small parts. They cost very little money.
Replace It
If the transformer is burnt you should replace the charger. Transformers are heavy and expensive. If the main control board is fried replace it. The cost of the board is almost the cost of a new charger.
Old chargers are also less efficient. They use more electricity. They are harder on your batteries. A modern smart charger is a better investment. It will extend the life of your battery pack.
Maintenance Tips to Prevent Failure
You want your charger to last a long time. A little care goes a long way.
Keep it Dry: Water is the enemy. Never leave your charger out in the rain. Keep it on a shelf off the floor.
Ventilation: Chargers get hot. They need air to breathe. Do not cover the charger with towels or rags while it is running. The heat needs to escape.
Clean Connections: Check the plugs once a month. Wipe off any dirt or grime. Clean connections allow power to flow freely.
Protect the Cords: Do not drive over the cords. Do not yank the cord from the wall. Treat the cables with care.
Frequently Asked Questions
Do you still have questions about your golf cart charger? Here are the answers to the most common questions we get from owners like you.
How do I know if my golf cart charger is bad or the battery?
Test the battery bank voltage first. If the batteries show over 25-30 volts but the charger won't turn on, the charger is likely bad. If the batteries drop voltage quickly after a charge, the batteries are the problem.
Can I charge a 48-volt golf cart with a 12-volt charger?
You cannot plug a 12V charger directly into the cart. However, you can charge each 12-volt battery individually in a sequence. This is slow but can "wake up" dead batteries so your 48V charger can take over.
Why does my golf cart charger get so hot?
It is normal for chargers to get warm during the bulk charge cycle. However, if it burns your hand or smells like melting plastic, it is overheating. Ensure it has good ventilation and the fan is working.
Can I leave my golf cart charger plugged in all the time?
Yes, if you have a modern automatic charger. They have a "float mode" that maintains the battery without overcharging. If you have an older manual timer model, you must unplug it once the cycle is done.
How do I reset my golf cart charger?
Unplug the charger from the wall and the cart. Wait 10 to 15 minutes for the internal capacitors to discharge. If your unit has a specific reset button, press it before plugging it back into the cart first.
How do I bypass the OBC on a Club Car?
You need to run a 10-gauge wire from the negative blade of the charging receptacle directly to the main negative battery post. This bypasses the computer but removes the automatic shut-off feature, so use a smart charger.
Power Up Your Golf Cart Today
You now know how to test a golf cart battery charger like a pro. You can check the voltage and find the bad parts easily. Do not let a silent cart ruin your weekend plans.
If your testing shows the charger is dead, do not stress. It might be time for an upgrade. A new smart charger will protect your batteries and keep them running longer.
Browse our full collection of golf cart chargers to find the right fit. We have the perfect match for your Club Car, E-Z-GO, or Yamaha. Stop guessing and start driving again.