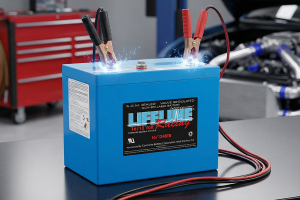
How to Put Water in a Golf Cart Battery: Quick & Easy
If your golf cart feels slow or weak, the batteries may need water. Low water levels can damage the battery and shorten its life.
Knowing how to put water in a golf cart battery helps keep your cart running smoothly.
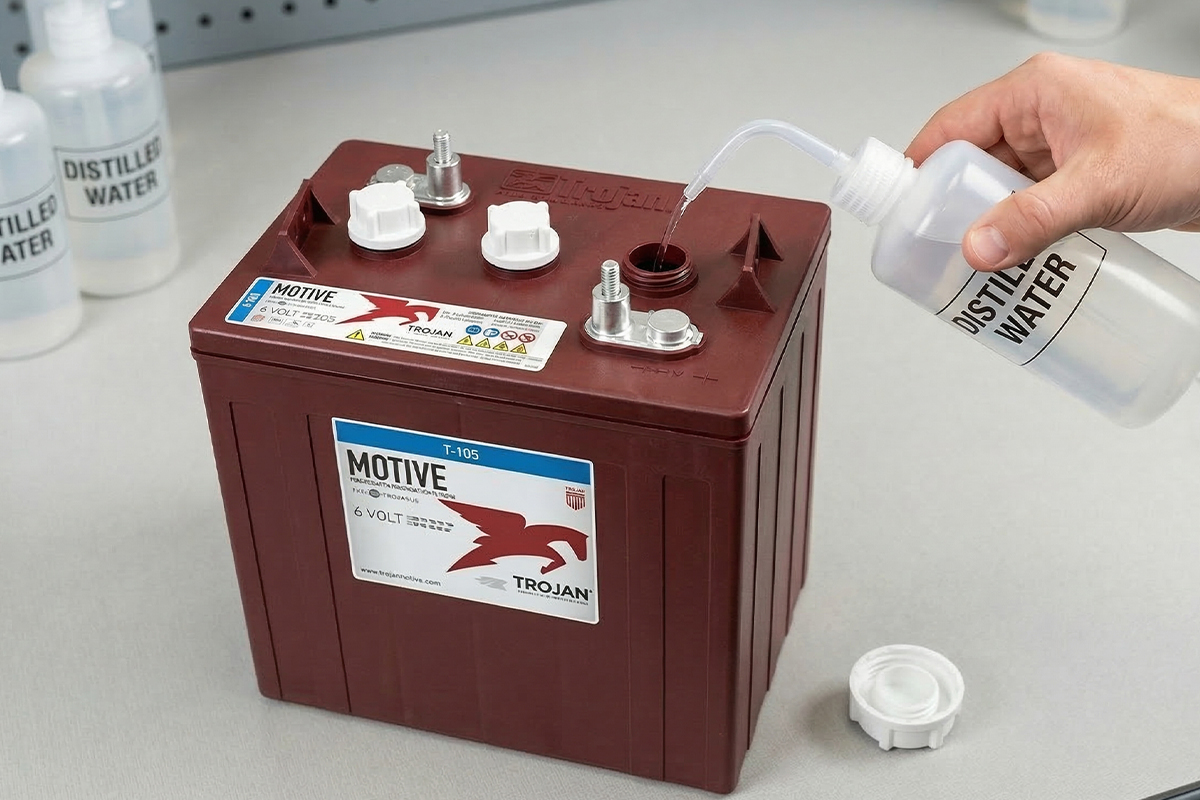
Start by lifting the seat to access the batteries. Remove the caps carefully and look inside each cell. The metal plates should be covered with water, but the cell should not be filled to the top. There’s an indicator line to show you how much water you need to put in.
Use distilled water only. Add just enough to cover the plates, and avoid overfilling, especially before charging.
Today, let’s see how to check fluid levels, which tools to use, and how to avoid common mistakes. By following these simple steps, you can maintain your battery's health and extend its life in just a few minutes.
The Chemistry of Water and Battery Maintenance
Your golf cart battery is far from a maintenance-free device. It is essentially a chemical factory encased in heavy-duty plastic. Inside, lead plates sit submerged in an electrolyte solution, a mix of sulfuric acid and water.
When you charge your battery, a chemical reaction occurs between these plates and the electrolyte, generating the energy that powers your cart.
However, this reaction comes with a side effect: water loss. During charging, the electrolyte solution heats up, producing hydrogen and oxygen gases. These gases escape from the battery through vent caps, naturally lowering the water level inside each cell.
If the water level drops too far, the lead plates become exposed. And that’s where the real damage begins. Exposed plates oxidize, crumble, and eventually fail. A dried-out battery plate cannot be repaired. Well, it can only be replaced, often at a high cost.
Maintaining the correct water level preserves the electrolyte balance, protects the lead plates, and makes your battery safer and more efficient to operate. Regular checks are the secret to extending your battery’s life. Signs your battery needs water are:
Reduced Power: Your cart struggles on hills or doesn’t respond like it used to.
Longer Charge Times: The charger seems to run endlessly, never reaching full charge.
Exposed Plates: Metal plates are visible when inspecting the cells. This is a critical warning.
Cracked Cases: Low water levels can cause overheating, warping, and cracking of the battery casing.
Ignoring these signs will shorten battery life and increase long-term costs. A quick check can save both frustration and money.
Essential Tools and Materials Required
Using the right tools makes the job safer and easier. A garden hose or kitchen cup can be dangerous. But proper equipment helps your battery last longer. Before you start, gather these items:
Distilled Water: Essential for topping off batteries. Lacks minerals that cause buildup.
Battery Filler Jug/Bottle: Automatically stops pouring when the correct water level is reached. Prevents overfilling.
Safety Goggles & Gloves: Protects against corrosive acid burns. Mandatory.
Baking Soda & Water Solution: Neutralizes acid spills and cleans corrosion.
Clean Rags or Paper Towels: Used to wipe the battery and prevent contamination.
Wrench: Needed for removing battery hold-downs or cable connections.
Distilled water is crucial. Tap water contains minerals such as calcium and magnesium, which accumulate on the lead plates and form a crust that prevents proper charging. Over time, this mineral buildup kills the battery. Investing in a gallon of distilled water, usually under $2, can save hundreds on replacement costs.
A battery filler bottle reaches deep into the cells. It stops automatically when full. No spills, no guesswork. The water level is always accurate, making the job quick and easy.
Good tools make a big difference. They help the work go smoothly and keep things safer. When the workspace is clean and properly set up, tasks become quicker, easier, and less likely to cause problems.
Safety Precautions
Read this section carefully. Batteries contain sulfuric acid, which is highly corrosive. Acid can eat through clothing and cause severe burns in seconds. Contact with the eyes can result in permanent damage.
Batteries also emit hydrogen gas during charging, which is highly explosive. A single spark can ignite the gas. The battery could explode and send acid, plastic, and metal flying everywhere.
You can use a desulfulator to reduce sulfation and minimize excessive gas formation. Cause this is not a scenario you want to experience.
Follow these safety rules rigorously:
Work in a Well-Ventilated Area: Never fill batteries in a closed garage. Open the doors and allow air circulation. Avoid breathing in fumes.
Turn Off the Cart: Ensure the key is in the "off" position before touching the battery.
Wear Protective Gear: Goggles and rubber gloves are non-negotiable. Acid burns are serious, and recovery is long.
Remove Jewelry: Rings, watches, and necklaces can conduct electricity and cause dangerous sparks.
No Smoking or Open Flames: Hydrogen gas ignites easily. Keep flames far away.
In case of a spill: Use a baking soda solution to neutralize acid. Pour it on the spill, it will bubble as it reacts. Wipe away the residue with a rag and rinse the area with water. Proper handling of spills prevents injuries and damage.
Step-by-Step Process: How to Put Water in a Golf Cart Battery
You have the tools, you’re equipped, and you’re safe. Let’s get your batteries topped up the right way. Take your time, rushing leads to spills and mistakes.
Step 1: Charge the Batteries Fully
This is an important step in battery maintenance. Always charge batteries before adding water.
Water levels change during charging. When a battery discharges, acid absorbs into the plates, lowering the liquid level. Charging returns the acid to the solution, raising the liquid. Filling a discharged battery to the top will lead to overflow during charging, causing acid spills and corrosion.
Plug in your charger and wait for it to shut off automatically. Only then should you begin adding water. Charging first prevents messy, damaging mistakes.
Step 2: Inspect and Clean the Battery Terminals
Before opening the caps, inspect your battery. Look for white or green crust, which indicates corrosion. Acid fumes reacting with metal create this debris. If left uncleaned, it can fall into the cells when you remove the caps, contaminating the battery.
Cleaning steps:
Dip a brush or rag in a baking soda solution.
Scrub terminals and battery tops gently.
Wipe off residue with a damp cloth and dry completely.
Clean terminals ensure proper electrical flow and a tidy workspace. They also prevent stray currents that could slowly drain your battery.
Step 3: Remove the Battery Caps
Golf cart batteries typically have three or six cells, each with a cap. Twist or pop off the caps to check water levels. Place caps in a clean container or plastic bag to prevent contamination.
Pro Tip: Never leave caps on a dirty floor, they can pick up dirt that damages the battery. Keeping them organized prevents frustration and ensures safe reassembly.
Step 4: Check the Electrolyte Levels
Use a flashlight to inspect each cell. Check the liquid level and lead plates.
What to look for:
Lead Plates: Submerged metal rectangles inside the cells.
Water Level: Should cover plates by 1/4 to 1/2 inch.
Fill Indicators: Some batteries have plastic rings inside cells to show the correct water level.
Low levels require immediate attention. Even if plates are slightly covered, topping off prevents long-term damage.
Step 5: Add Distilled Water Correctly
Fill your battery filler bottle with distilled water. Insert the nozzle into the cell and pour. Listen for a gurgle, the automatic shutoff stops flow when the level is correct.
If using a regular jug, pour slowly until the water is 1/4 inch above the plates. Never fill more than the indication level. Batteries need air space for expansion during charging. Overfilling causes acid to boil over, damaging the battery tray and frame.
Step 6: Replace the Caps and Wipe Down
Replace caps snugly. Do not overtighten. Use a rag to wipe any water off the battery top. A dry surface prevents dirt accumulation and stray electrical paths that can drain the battery.
Common Mistakes to Avoid When Filling Golf Cart Batteries
Even with a guide, mistakes happen. Knowing what not to do is as important as knowing what to do.
Avoid these errors:
Using Tap Water: Minerals cause internal short circuits and permanent damage.
Filling Before Charging: Leads to acid overflow and weakens the battery.
Overfilling: No expansion room leads to spitting acid and corrosion.
Under-filling: Exposed plate sulfate and reduce chemical reaction efficiency.
Ignoring Leaks: Persistent water loss may indicate a cracked case.
Avoiding these mistakes ensures your battery lives longer and functions optimally.
How Often Should You Water Your Golf Cart Batteries?
Frequency depends on usage and environment. Heat accelerates water loss, heavy daily use consumes more water than occasional weekend rides.
Recommended schedule:
Usage Type | Check Frequency |
Heavy Use (Daily) | Bi-weekly |
Moderate Use (Weekends) | Monthly |
Storage/Off-Season | Monthly |
Do not wait for slow performance. Check water levels during routine cart maintenance. It takes two minutes but prevents expensive repairs. If you are running 8-volt deep cycle batteries for higher speed or torque, you may find that the increased energy output requires more frequent checks.
What to Do If You Accidentally Overfill the Battery
Overfilling happens, even to experienced owners. Don’t panic. Remove excess liquid safely using a suction tool or turkey baster.
Steps:
Insert the suction tool into the cell.
Draw out excess liquid to the correct level.
Dispose safely; acid cannot be poured down drains. Take it to a recycling center.
Overfilled cells before charging are mostly water, after charging, it’s an acid-water mix. Handle with extreme caution.
Frequently Asked Questions (FAQs)
Even with a clear guide, battery maintenance can raise specific questions about best practices and safety. Below are answers to the most common queries owners have when learning to care for their golf cart batteries.
Can I use tap water in a golf cart battery if I’m in a pinch?
No, never use tap water. It contains minerals that build up on the plates and ruin the battery. Always use distilled water to protect your investment.
Why is it necessary to charge the battery before adding water?
Water levels rise when the battery charges. If you fill a discharged battery, it will overflow during charging, causing acid spills and corrosion.
How do I know exactly how much water to put in the battery?
Fill until the water covers the plates by about 1/4 to 1/2 inch. Never fill to the very top; the battery needs air space to expand.
What should I do if I accidentally overfill the battery?
Use a suction tool or turkey baster to remove the extra liquid. Be careful, as the liquid contains acid and needs safe disposal.
How often should I check the water levels in my golf cart?
Check weekly for daily use, or bi-weekly for weekend use. If the cart is in storage, check it at least once a month.
Is it safe to add water to a battery that has a cracked casing?
No. A cracked case means the battery is failing and dangerous. Stop using the cart and replace the battery immediately.
Ready To Boost Battery Longevity
By now, you should have a clear understanding of how to put water in a golf cart battery correctly. This routine maintenance is the difference between a cart that lasts for years and one that fails prematurely.
By sticking to the essentials, charging before filling, using distilled water, and wearing protective gear. You also protect the lead plates from irreversible damage.
Do not wait for reduced power or visible corrosion to take action; consistent checks are the secret to longevity.
A few minutes of care prevent expensive replacements and guarantee your cart remains a reliable source of freedom and fun. Keep your batteries healthy, and they will keep you moving.