How to Replace Battery in Mobility Scooter: A Complete Technical Guide
Your mobility scooter is your key to independence. But when it feels sluggish or will not start, the battery is likely dead. The good news is that you can fix this yourself easily.
To replace the battery in a mobility scooter, turn off the power and remove the seat to expose the battery pack. Disconnect the black (negative) wire first, then the red (positive) wire. Swap the old batteries with new ones of the same voltage and size. Reconnect the red wire first, then the black one, and secure the cover.
In this guide, we will show you exactly how to replace battery in mobility scooter step-by-step. We will cover the tools you need and safety tips. Let’s get your freedom back.
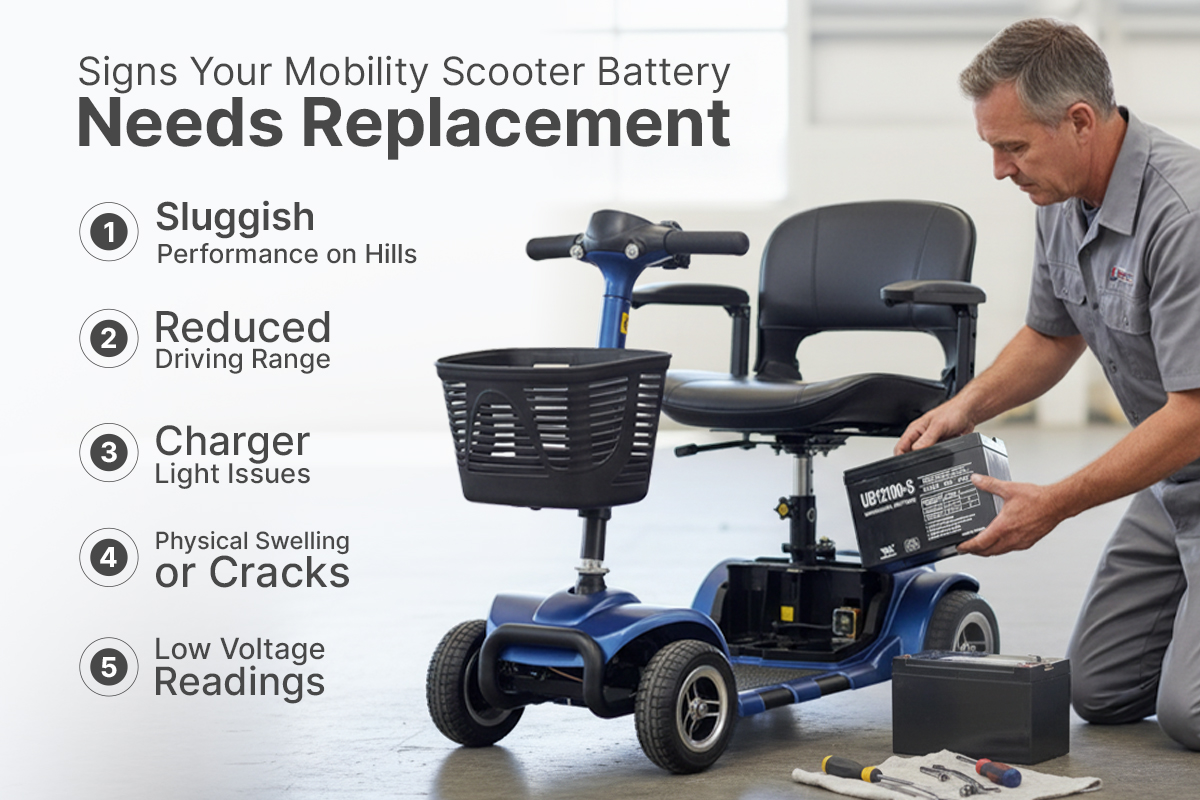
Signs Your Mobility Scooter Battery Needs Replacement
How do you know the battery is the problem? Sometimes the issue is the charger or the motor. But usually it is the battery pack. You need to be sure before you buy new parts. There are clear signs to look for.
Sluggish Performance on Hills
The most common sign is sluggishness. Your scooter might feel slow. It might struggle to climb small hills.
This means the voltage drops when you ask for power. The battery is weak. It cannot push enough energy to the motor to keep you moving fast.
Reduced Driving Range
Another sign is a short range. Maybe you used to drive for two hours. Now you can only drive for twenty minutes.
This is a capacity issue. The "gas tank" of your battery has shrunk. Old batteries cannot hold a full charge anymore.
Charger Light Issues
Check your charger light too. Plug in your scooter. The light should turn red or orange.
This means it is charging. If it stays green right away, the battery might be bad. A bad battery can refuse to accept a charge.
Physical Swelling or Cracks
You can also look at the battery case. Look for swelling or cracks. If the sides of the battery look puffy, it is dangerous.
This happens from overcharging or heat. You must replace a swollen battery immediately to avoid acid leaks.
Low Voltage Readings
Finally, you can use a tool called a multimeter. This measures the voltage. A full 12-volt battery should read about 12.7 volts or higher.
If it reads below 11.8 volts, it is likely dead. We will talk more about testing later. Now that we know the battery is bad, we need to find a new one.
Understanding Mobility Scooter Battery Types
You cannot just buy any battery. You need the right match for your scooter. Most mobility scooters use a specific type of power. This is usually a 24-volt system. It uses two 12-volt batteries connected together.
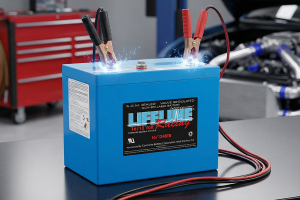
There are two main types of chemistry. These are Sealed Lead Acid (SLA) and Lithium. Most scooters come with SLA batteries. Within SLA there are Gel and AGM. AGM stands for Absorbent Glass Mat. These are the most common. They are safe and do not spill.
Gel batteries are good for deep discharge. They last a long time. But they are often more expensive. AGM is usually the best choice for standard users. They are reliable and cost less.
You also need to check the size. Batteries come in groups. A small travel scooter uses 12Ah or 18Ah batteries. "Ah" stands for Amp Hours. Think of this like the size of a gas tank. A higher Ah number means you can drive longer.
Big heavy-duty scooters use Group U1 batteries. These are usually 34Ah or 35Ah. They are heavy and powerful. You must check your old battery label. It will tell you the voltage and the amp hours.
Always replace both batteries at the same time. Never mix an old one with a new one. This will kill the new battery very fast. You want a fresh start for your machine.
If you are unsure about which size fits your model, you should check a reliable source. You can find the correct voltage and rating in our catalog of wheelchair and mobility scooter batteries. This will ensure you get a perfect fit.
Tools and Safety Precautions
Working with batteries can be dangerous if you are careless. But it is safe if you are smart. Safety is our first priority. You are dealing with electricity and acid.
First, you need to protect yourself. Wear safety glasses. This protects your eyes from sparks. You should also wear gloves. Batteries contain acid and lead. You do not want that on your skin.
Remove any metal jewelry. Take off rings and watches. Metal conducts electricity. If your ring touches both battery terminals, it will get hot very fast. It can cause a bad burn.
Now let’s gather your tools. You do not need a whole shop. A few simple tools will do the job.
Phillips Head Screwdriver: This is for the screws on the plastic cover.
Wrench or Socket Set: You usually need a 10mm or 13mm size. This removes the bolts on the battery terminals.
Camera or Phone: This is very important. You will use it to take pictures of the wires.
Wire Cutters: You might need these to cut zip ties.
Multimeter: This is optional but helpful for testing.
Work in a dry area. Do not change batteries in the rain. Make sure you have good light. You need to see the colors of the wires clearly.
Make sure the scooter is turned off. Take the key out of the ignition. Locate the free-wheel lever. Engage the brake so the scooter does not roll away.
Once you have your gear ready, we can start the work. It is time to get your hands a little dirty.
Step-by-Step Replacement Guide
This section is the most important part. We will go through the process slowly. Do not rush. Follow these precise steps on how to replace battery in mobility scooter to ensure safety and performance.
Step 1: Locating and Accessing the Battery Compartment
The batteries are usually under the seat. Sometimes they are under the floorboard. It depends on your model.
First, you should remove the seat. There is usually a lever under the seat. Pull the lever and lift the seat up. It should slide right off. Set it aside in a safe place.
Next, you need to remove the shroud. The shroud is the plastic cover. It protects the scooter's insides. It might be held down by Velcro. Or it might have screws.
If there are screws, use your screwdriver. Keep the screws in a cup. You do not want to lose them. If it is Velcro, just pull gently. Lift the shroud off the scooter.
Now you will see the battery box or the batteries themselves. On travel scooters, the batteries are in a portable box. You can lift the whole box out by the handle. On larger scooters, the batteries sit directly on the frame.
Step 2: Disconnecting the Old Batteries
You can see the batteries now. They look like black or grey bricks. They have wires connected to them. Before you touch anything, take your phone. Take a clear picture of the wires. You need to know exactly where they go later.
We need to disconnect the wires. Always start with the negative terminal. This is the black wire. The terminal is usually marked with a minus sign (-).
Use your wrench to loosen the bolt. If it is a slide-on connector, just pull it firmly. Remove the black wire. Move it away from the terminal.
Now do the same for the positive terminal. This is the red wire. It is marked with a plus sign (+). Remove the red wire.
Some scooters have a main wiring harness. This is a big plug that connects the batteries to the scooter. Unplug this connector. It usually has a clip you need to squeeze.
Be careful not to let the wrench touch both terminals at once. This will cause a spark. It can scare you. Just move slowly and focus on one wire at a time.
Step 3: Removing the Battery Pack
The wires are off. Now you can remove the batteries. They are heavy, so be careful. Lift with your legs and not your back.
Travel scooters usually have a battery pack case. You might need to open this case. Flip it over and remove the screws on the bottom. Open the plastic shell. You will see the batteries inside.
Remove any foam padding. Sometimes the batteries are held in by straps. Undo the Velcro straps. Lift the old batteries out of the scooter or the box.
Check the battery box for dirt. There might be dust or corrosion inside. Wipe it out with a clean cloth. If you see white powder that is dried acid. Wear your gloves and clean it up.
Inspect the wires too. Look for cuts or burns. If the wires look ba,d you might need to replace them too. But usually they are fine.
Step 4: Installing the New Batteries
Now we put the new batteries in. Place them into the battery box. Make sure they sit flat. They should not wiggle around.
Pay attention to the position. The terminals should face the same way as the old ones. Look at the picture you took earlier. Match the position exactly.
For those who use their scooter heavily, you might want an upgrade. Some batteries are built stronger. You can choose a robust Motobatt 12V 35Ah deep-cycle battery. These are known for their durable internal grids. They handle vibration very well.
Place the batteries securely. If there were straps, put them back on. Tighten the straps so the batteries do not move.
Now we need to connect the wires. This is where people get confused. But you have your photo. Correct wiring is the most critical part of learning how to replace battery in mobility scooter.
Mobility scooters use a "Series Connection". This creates 24 volts from two 12-volt batteries. You will see a short wire. This wire connects the Positive (+) of one battery to the Negative (-) of the other battery. This bridge is essential.
Connect this bridge wire first. Tighten the bolts. The connection must be tight. A loose bolt causes heat.
Step 5: Reconnecting to the Scooter
You have the bridge wire connected. Now you have two empty terminals left. One is Positive (+) on the first battery. The other is Negative (-) on the second battery.
Connect the main red wire to the empty Positive terminal. Tighten the bolt. Then connect the main black wire to the empty Negative terminal.
You might see a small spark. This is normal. It means the capacitors are charging. Do not worry unless the spark is huge.
Check all your connections. Wiggle the wires. They should not move. If they are loose, tighten them more. But do not break the bolt. Just make it snug.
Put the plastic cover back on the battery box. Put the screws back in. Place the battery pack back onto the scooter.
Step 6: Reassembly and Testing
We are almost done. We just need to put the scooter back together. Put the shroud back over the frame. Line up the screw holes.
Put the screws back in. Do not over-tighten the plastic. It can crack. Press the Velcro down if you have that.
Put the seat back on. Make sure it clicks into place. It should be locked.
Now insert the key. Turn the scooter on. Look at the battery gauge. It should show full bars. The light should be steady.
Test the scooter in a safe place. Drive it forward a few feet. Drive it backward. Listen for strange noises. It should sound smooth.
If the scooter does not turn on, check the fuse. Sometimes the fuse blows during installation. The fuse is usually on the battery pack. It looks like a car fuse.
Congratulations. You did it. You saved money and learned a new skill.
How to Dispose of Old Mobility Scooter Batteries
Now you have two heavy old batteries. You cannot throw them in the trash. This is illegal in most places. It is also bad for the earth.
These batteries contain lead and acid. Lead is toxic. Acid burns the soil. We need to recycle them properly.
The good news is that these batteries are 99% recyclable. The plastic, lead, and acid can all be reused. This makes new batteries cheaper.
You can take them to a recycling center. Most cities have a waste facility. You can also take them to an auto parts store. Places that sell car batteries will usually take them for free.
Some scrap yards will even pay you for them. Lead is a valuable metal. Call around and ask. Just make sure they do not end up in a landfill.
Transport them carefully. Put them in a cardboard box or plastic bin. Do not let them tip over. Wash your hands after you drop them off.
Maintenance Tips to Extend Your New Battery’s Life
You just bought new batteries. You want them to last a long time. Batteries are not cheap. With good care, they can last for years.
Charge After Every Use
The most important rule is to keep them charged. Charge your scooter after every use. Even if you only drove for ten minutes. Plug it in.
Never leave the batteries flat. If you drain them to zero, they might die forever. This is called deep discharge. Avoid this if you can.
Winter Storage Rules
If you store your scooter for winter, charge it once a month. Batteries lose power even when sitting. A monthly charge keeps them healthy.
Also, keep the terminals clean. Look for white corrosion. This stops the power flow. You can clean it with a wire brush.
Fight Sulfation with a Desulfator
There is a science to battery death. It is called sulfation. Lead sulfate crystals form on the plates inside. This makes the battery weak.
To prevent future failure, you can install a 24-volt battery desulfator. This device uses wave technology to dissolve sulfate crystals. It can extend battery life by up to 3 times.
Watch the Temperature and Tires
Avoid extreme temperatures. Batteries hate the heat. Do not leave your scooter in the hot sun for days. They also hate freezing cold. Store the scooter in a garage or shed.
Check your tire pressure too. Flat tires make the motor work harder. This drains the battery faster. Keep your tires pumped up.
By following these tips, you save money. You will not have to replace the batteries again for a long time.
Frequently Asked Questions (FAQ)
Many people have questions about their mobility scooter batteries. It is normal to wonder about battery life and care. Here are answers to some of the most common questions.
Do I need to replace both batteries at the same time?
Yes. You must always change both. If you mix an old battery with a new one, it is bad. The old battery pulls down the new one. They will both fail very quickly. Always buy a matched pair.
Can I put a larger battery in my mobility scooter?
Maybe. You can upgrade the Amp Hours (Ah). For example, you can go from 33Ah to 35Ah. This gives you more range. But the physical size must fit. The battery box has limited space. Measure your box before you buy larger batteries. The voltage must stay the same. You cannot switch from 12V to 24V batteries.
How long do mobility scooter batteries last?
On average, they last about two to three years. This depends on usage. If you use it every day, it might be less. If you take good care of them, they can last longer.
My new batteries die quickly. Why?
New batteries need a "break-in" period. They might not reach full power for the first 10 cycles. Charge and use them a few times. They will get stronger. Also, check your charger. A bad charger can ruin good batteries.
Is it safe to leave the charger on all night?
Most modern chargers are "smart". They turn off when the battery is full. It is usually safe to leave them overnight. But do not leave them for weeks. Unplug it if you go on vacation.
Regain Your Independence
We have covered a lot of information. You now understand the entity of the scooter power system. You know the attributes of voltage and amps. You know the tools and the safety steps.
Replacing your own battery is empowering. It gives you control over your mobility. You do not have to wait for a repair shop. You can do it in your garage.
Remember to work slowly. Connect the red to red and the black to black. Recycle your old units responsibly. And keep your new ones charged up.
Now that you know how to replace battery in mobility scooter, you can maintain your independence. You can keep your machine running smoothly. Enjoy your ride and stay safe out there.