How to Replace Your Golf Cart Battery
The power and speed of your golf cart depends upon the strength of its batteries. Several factors determine how long your batteries will last. These include how well you maintain and charge your batteries. With proper maintenance and care, your battery can last several years. At some point, the batteries will reach the end of their serviceable life. These instructions will help you replace your own golf cart batteries and save money.
Locate the Golf Cart Battery and Assemble Your Supplies
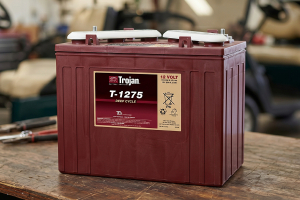
In some models, the batteries are located beneath the driver’s seat. In other models, the batteries are in a compartment in the front end of the cart. Open the compartment to determine the type of batteries that your particular cart requires. Possible options include a single battery or a set of six. While replacing the battery is not difficult, it is essential that you know and comply with the manufacturer’s guidance for replacing your golf cart battery. You will also need a wire brush, insulated wrench, battery carrier, and a solution of ten-part water and one-part baking soda.

Safety Precautions
You must not smoke when working near batteries. Wearing proper eye protection and gloves will prevent battery acid from getting into your eyes or on your skin. Ensure that you do not lay a wrench or other metal objects across both battery terminals causing it to arc.
Removing the Batteries
Identify and loosen the clamp on the battery’s negative terminal. The attached wire is typically red. Remove this clamp first. The next step is to locate the black colored, positive clamp. Loosen and remove it. Ensure that you do not allow the two battery cables to contact each other, another battery, or cables.
Remove the brace that secures the battery in position. Use battery carrier straps to lift the defective battery from the compartment. Remove any battery acid that has accumulated on the clamps or the support rack using the wire bristle brush. After you rinse the clamps and rack with the baking soda solution to neutralize the acid, it is important to wipe them dry. This will ensure that the cables and clamps are in good working order. If you notice any problems, replace the clamps and cables as well.
Installing the New Golf Cart Battery
Using the carrier straps, place the new single battery or pack in the compartment and secure it in place with the bracket. If the cart requires a battery pack, ensure that you install the new batteries in the correct order.
Apply a thin coat of petroleum jelly to the battery terminals to help prevent corrosion. Carefully reattach the black clamp to the positive terminal first, and then attach the red clamp to the negative terminal. Ensure that you do not cross connect the wires; it can short out the electrical system in your cart.
After you install and properly charge the new batteries, your golf cart will be ready to transport you and your clubs around the course.