A Definitive Guide on How to Use a Car Battery Charger Safely & Effectively
It is a terrible feeling. You get in your car, turn the key, and hear nothing but a click. A dead car battery can ruin your whole day.
But what if you could fix it yourself? It is actually quite easy with the right tool. This guide will show you how to use a car battery charger.
We will make it simple and safe. You will learn everything you need to know. You can protect yourself and your car's battery by following these steps.
First Things First: Understanding the Core Components
Before we start charging, let’s look at the tools. Knowing the parts will help you feel more confident. It is a simple tool once you know it.
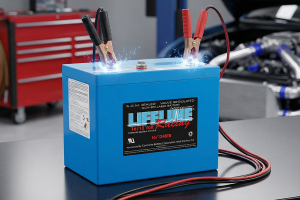
The Charger Itself
The main part is the charger. This is the box with the screen and buttons. It has a power cord that plugs into a wall outlet, just like a phone charger.
The Cables and Clamps
Then, you have the charging cables. There are two of them, one red and one black. These cables send the power from the charger to your car's battery.
At the end of the cables are the clamps. The red clamp is for the positive side. The black clamp is for the negative side. They look like big metal clips that you can pinch open.
The Car Battery Terminals
Finally, let's look at your car battery. You will see two metal knobs on top called terminals. One has a plus sign (+) and is the positive terminal.
The other has a minus sign (-) and is the negative terminal. Sometimes, you might see white, crusty stuff on these terminals. This is called corrosion, and it is a good idea to clean this off before you charge for a good connection.
Now that you know the parts, we can move on to the next step. It is important to know what kind of charger you have.
Choosing the Right Tool for the Job: Types of Car Battery Chargers
Not all battery chargers are the same. They come in different types for different jobs, and knowing your charger type helps you do the job right. Let's look at the main options you will find.
Trickle Chargers and Battery Maintainers
A very common type is the trickle charger, also known as a battery maintainer. These devices provide a very small, steady stream of power to a battery.
They are the perfect tool if you plan to park your car for a long time, like over the winter. A trickle charger’s job is to keep a healthy battery full without ever overcharging it, which keeps it in great shape.
Smart Chargers (The All-Rounder)
For most car owners, the best and most common choice is a smart charger. These are also called multi-rate chargers because they are very clever and do most of the work for you.
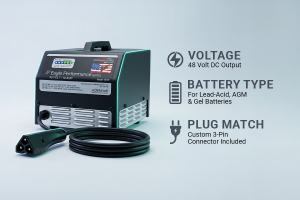
A smart charger can automatically figure out what kind of battery you have. It knows if it is a common lead-acid battery or another type like an AGM. It also sets the right voltage (usually 12V for a car) and chooses the best charging speed.
Many of these chargers have a "fast charge" setting. However, using a slower, standard charge is often better for your battery's long-term health.
Heavy-Duty and Industrial Chargers
You might also see heavy-duty chargers. These are powerful units often found in a professional mechanic's shop. They are used for very large batteries in trucks or for providing a powerful jump-start to a completely dead battery.
For everyday home use, most people will find a smart charger is the safest and easiest option. They are very effective and take the guesswork out of the process.
Now that you've identified your charger type, the next critical step is ensuring a safe environment.
Safety is Non-Negotiable: Essential Preparations Before You Begin
Before you plug anything in, we need to talk about safety. This is the most important part of the whole process. Following these rules will keep you and your car safe from harm.
Taking a few minutes to prepare makes the entire job smooth and risk-free. Here is a simple checklist to run through before you start:
Work in a Ventilated Area: A car battery can release a gas called hydrogen when it charges. You cannot see or smell this gas, but it is flammable. Because of this, you should always charge your battery in a well-ventilated area. Open your garage door or work outside if you can.
Wear Protective Gear: It is a great idea to wear safety glasses. This protects your eyes from any accidental sparks or battery acid. Wearing gloves is also smart to keep your hands clean and safe.
Inspect the Battery First: Take a quick look at the battery itself. Check for any cracks in the plastic case. If you see cracks, leaks, or any bulging, stop right there. A damaged battery is dangerous and should be replaced by a pro.
Turn Everything Off: Make sure your car's engine is off. The lights, radio, and air conditioner should all be off, too. Most importantly, your battery charger should be unplugged from the wall outlet before you connect any clamps.
Once you are all set up and have checked these safety steps, you are ready to start the main process.
How to Use a Car Battery Charger in 7 Simple Steps
This is the main event. We will now go through the exact steps to charge your battery. Follow them in order for the best results.
Step 1: Clean the Battery Terminals
If you see any of that white or blue-green powder on the terminals, clean it off. A wire brush works great. A good, clean connection helps the charger work its best.
Step 2: Connect the Positive (Red) Clamp
Take the red clamp from your charger. Connect the red clamp to the positive (+) terminal of the battery first. Make sure it has a firm grip on the metal.
Step 3: Connect the Negative (Black) Clamp
Now, take the black clamp. This is a very important step. Do not connect the black clamp to the negative (-) terminal of the battery. Instead, connect the black clamp to a solid, unpainted metal part of the car's frame. A thick bolt on the engine block is a great spot. This is called grounding, and it is much safer. It prevents any sparks from happening near the battery.
Step 4: Set the Charger Settings
Look at your charger. You may need to set the voltage. For cars, this should almost always be 12V. Then, you might choose an amperage or charging speed. A lower number is slower but often better for the battery. If you have a smart charger, it might do this for you.
Modern smart chargers make this part easy. For example, a quality unit like the MotoBatt Fat Boy can figure out the settings for you. It helps make sure your battery gets the perfect charge every time.
Step 5: Plug In and Power On the Charger
With the clamps connected correctly, it is time for power. Plug the charger's power cord into a wall outlet. Then, turn the charger on if it has a power button.
Step 6: Monitor the Charging Process
Your charger should now show that the battery is charging. Smart chargers will stop on their own when the battery is full. This is a great feature. If your charger is manual, you will need to check on it. Charging a car battery can take anywhere from 4 to 24 hours.
Step 7: Disconnect Safely After Charging
Once the battery is fully charged, you disconnect in the reverse order. First, unplug the charger from the wall outlet. Then, remove the black (negative) clamp from the car's frame. Finally, remove the red (positive) clamp from the battery terminal.
And that is it! You have successfully charged your car battery.
Advanced Scenarios & Common Questions
Charging a car battery might still feel a little bit scary. You want to make sure you do it right and keep your vehicle safe. These common questions will give you the quick answers you need.
Can I leave a car battery charger on overnight?
You can leave a smart charger on overnight safely. These devices turn off automatically once the battery is full to prevent damage. However, manual chargers must be watched closely. Leaving them on too long can cause serious overcharging.
Do I need to remove the battery to charge it?
You do not need to remove the battery from your car. Most modern vehicles are safe to charge while the battery stays connected. Just ensure the car is off and the charger is grounded to the frame properly.
How long does it take to fully charge a battery?
It usually takes between 4 and 24 hours to reach a full charge. This time depends on your charger’s speed and how empty the battery is. A slower charge is often better for your battery’s long-term health.
What happens if I connect the clamps to the wrong terminals?
Connecting clamps to the wrong terminals is called reverse polarity. This mistake can blow fuses or damage your car's sensitive electronics. Always check the plus and minus signs twice before turning the power on for your charger.
Is there a difference between a jump starter and a charger?
Yes, a jump starter provides a quick burst of power to start your engine immediately. A battery charger provides a slow, steady flow of electricity to fully refill the battery. A charger is better for long-term battery health.
Can a car battery charger fix a completely dead battery?
A charger can often fix a battery that is simply drained from lights being left on. However, if the battery is very old or has internal damage, it may not hold a charge. In those cases, replacement is necessary.
Your Guide to Mastering the Car Battery Charger
Learning the right way to care for your vehicle is a great skill to have. Now that you know how to use car battery charger, you never have to feel stuck when your car will not start. You can save time and keep your battery healthy for a very long time.
It is always smart to have the right tools ready in your garage. If you want a simple and safe way to keep your car ready, check out our best automotive battery chargers today. Having a reliable charger at home means you are always prepared for any surprise.
If you have many different vehicles, the MotoBatt Fat Boy is a powerful choice that works with almost any battery type. For smaller vehicles or keeping a battery fresh during storage, the MotoBatt Little Boy is a perfect and compact tool. Taking care of your car has never been this easy or safe