Golf Cart Charger Compatibility Guide: Voltage, Battery Type and Plug Match
Many golf cart owners end up buying the wrong charger at least once. It’s frustrating and expensive. The good news is, choosing the right charger doesn’t have to be confusing. A Golf Cart Charger Compatibility Guide makes it simple.
It shows you how to match your cart with the correct power source confidently, protecting your investment and keeping your cart ready for every ride. Charging a golf cart can feel a bit difficult. Wires, plugs, volts, and battery types all seem complicated. The wrong charger can even damage your batteries or electronics.
Today, let’s break it down. You’ll learn how to check your cart’s voltage, identify the right plug, and match the charger to your battery type. Follow these steps, and you’ll avoid mistakes, save money, and always have a golf cart ready to go.
Why Generic Chargers Can Destroy Your Batteries
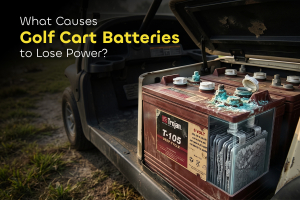
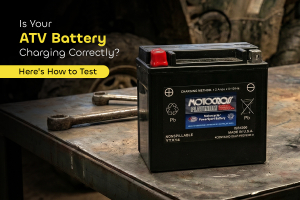
Using a cheap, generic charger is risky. The wrong charger can damage a $1,500 battery set in just a few weeks. Your batteries are the core of your golf cart.
A mismatched charger can push too much power, causing the internal acid to overheat, boil, and leak. Too little power is just as harmful. Batteries left partially charged develop sulfation. It’s a buildup of hard crystals on the lead plates. You may need a premium quality desulfator to fix it.
Once that happens, they can’t hold a charge properly, and your cart may stop mid-use. Safety is another serious issue. Quality chargers include sensors that monitor heat and shut off if temperatures rise too high.
Cheap chargers often skip these protections, increasing the risk of overheating or even fire in your garage or shed. Replacing batteries, or worse, your cart, costs far more than buying a reliable charger upfront. Here are the risks of using the wrong charger:
Thermal runaway: Batteries overheat to the point of melting
Plate sulfation: Lead plates harden and lose their ability to store energy
Off-gassing: Harmful fumes build up in enclosed spaces
Battery leaks: Acid escapes and damages your cart’s frame and parts
A Golf Cart Charger Compatibility Guide for Every Brand
Finding the right charger requires a look at three main pillars. These are your system voltage, your plug shape, and your battery chemistry. If you match all three, your cart will run perfectly for years.
Most owners start by looking at the plug. While the plug is important, it is actually the second step. You must confirm your voltage first. A 36-volt charger cannot fill a 48-volt battery set.
Likewise, a 48-volt charger will destroy 36-volt batteries instantly. Below is a master table to help you identify the common settings for the biggest brands in the industry.
Cart Brand | Standard Voltage | Common Plug Name | Key Model Examples |
Club Car | 36V or 48V | Round 3-Pin | DS, Precedent, Onward |
EZGO | 36V or 48V | D-Plug / Powerwise | TXT, Medalist, RXV |
Yamaha | 36V or 48V | Nabson / 2-Pin | G19, G22, Drive (G29) |
Star EV | 48V | Round 3-Pin | Classic, Sport |
Columbia | 36V or 48V | Crowfoot | ParCar, Eagle |
Pillar 1: Voltage Alignment (36V vs. 48V Systems)
Voltage is the most important number to know for your golf cart. You won’t see it on the dashboard, you have to check the batteries themselves. Each battery has a set voltage, and together they make up the system voltage.
To check a battery’s voltage, look at the caps on top. These are the holes where you add water. Each cap equals 2 volts. A battery with three caps is 6 volts, and one with four caps is 8 volts.
To find your total system voltage, count the number of batteries in your cart and multiply it by the voltage of one battery. This gives you the total voltage for the whole cart. Use this simple math to be sure:
6 Batteries with 3 caps each: 6 x 6 = 36 Volts.
6 Batteries with 4 caps each: 6 x 8 = 48 Volts.
4 Batteries with 6 caps each: 4 x 12 = 48 Volts.
But what if your batteries don't have caps? Some batteries are "sealed." In that case, look for a label on the side. It will clearly state "6V," "8V," or "12V." Always double-check this math before you place an order.
Pillar 2: Plug and Connector Type
The plug connects your charger to your cart. It works like a handshake. If it does not fit properly, power will not flow. There are many types of plugs, but five types cover almost 90 percent of carts today.
Never force a plug into a socket. If it does not slide in easily, it is probably the wrong one. Forcing it can bend the pins and create a loose connection, which produces heat. Melted plastic around charging ports is common and can easily cause a fire. Here is a list of the five most common plugs:
The Crowfoot: This plug has two flat, angled blades. It looks like a bird's footprint. It was very popular on older carts from the 1980s and 1990s.
The D-Plug: This is a rectangular plug with one side that is curved into a "D" shape. It usually has two large pins inside. It is the standard for EZGO TXT carts.
The Round 3-Pin: This is a circular plug with three small pins. It is the most common plug for Club Car models made after 1995.
The Nabson: This is a rectangular Yamaha plug. It has two pins and a specific notch on the side.
The RXV Triangular: This plug is shaped like a triangle with three pins. It is specifically for the newer EZGO RXV 48-volt models.
Pillar 3: Matching Charger Tech to Battery Chemistry
There are different types of cart battery. This is what determines how it should be charged. Most older golf carts use flooded lead-acid batteries, which contain liquid acid that needs to be topped off with water. Newer carts may use Lithium-Ion batteries, which are lighter and last longer.
Lead-acid batteries need a soaking period at the end of charging to mix the acid and prevent it from settling. Lithium batteries do not need this. Extra soaking can actually damage them.
Lithium cells have a built-in computer called a Battery Management System (BMS), and the charger must stop charging as soon as they are full.
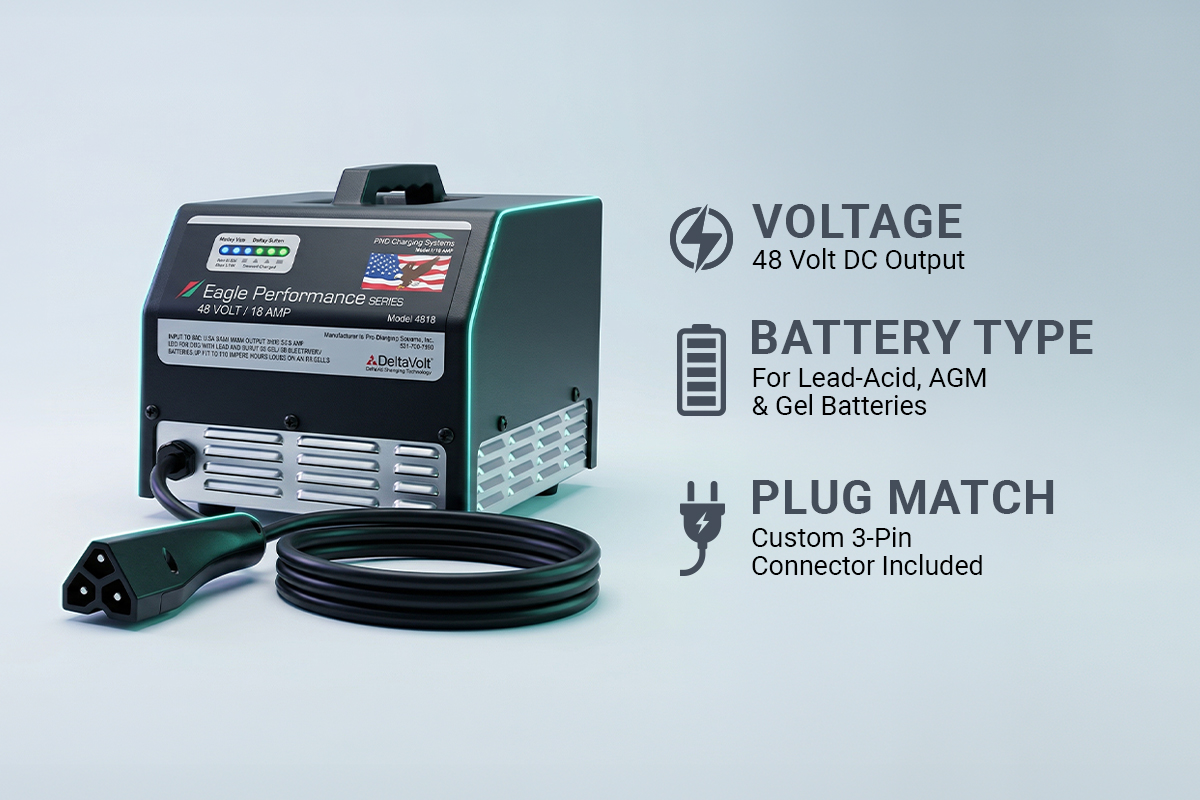
A smart solution is a Smart Charger. These chargers often let you select Lead-Acid or Lithium with a switch or button. This is useful if you plan to upgrade to lithium later, so you won’t need a second charger.
How To Select and Connect Your Charger For Golf Cart Batteries
Getting the right charger and setting it up properly doesn’t have to be complicated. With a clear step-by-step approach, you can avoid mistakes and get your cart running smoothly without guesswork.
Identify your cart’s brand and approximate year. You can usually find this on a sticker near the glove box.
Confirm the voltage using the “cap test.”
Take a clear photo of your charging port so you can match it when shopping.
Check your battery type to see if it is lead-acid or lithium.
Choose the right amperage. Most home chargers are around 15 amps, which offers a good balance of speed and battery health.
Look for safety certifications like UL or CE.
Make your purchase, then plug the charger into the wall first and the cart second.
Once everything is connected, the charger will guide you. A red light usually means it is charging, while a green light means you are ready to go. If a light flashes, check the manual. In most cases, it points to a minor issue, such as a loose connection, that can be fixed quickly.
Advanced Performance: Amperage, Efficiency, and Smart Logic
More power isn’t always better. With chargers, amperage controls how fast your batteries charge. A 25-amp charger works faster than a 10-amp one, but faster charging creates more heat.
For lead-acid batteries, slower charging is safer. That’s why a 15-amp charger is the standard. It charges at a steady rate without overheating. A charger that’s too powerful can damage the internal plates and permanently ruin the battery.
Efficiency also matters. Older chargers use large transformers. They are heavy, run hot, and waste more electricity. Newer switch-mode chargers are lighter and more efficient.
They use smart electronics to control power and can reach about 90 percent efficiency, helping reduce your energy costs over time.
Safety First: UL Listings and Build Quality Standards
A golf cart charger handles a lot of electricity. It draws power from your home and pushes it into your cart for hours, so safety must come first. Never buy a charger without a safety certification.
Look for the UL mark, which stands for Underwriters Laboratories. It means engineers have tested the charger to make sure it won’t start a fire. Spending a few extra dollars for this protection is worth it. Cheap chargers from unknown sellers often skip these tests.
Check the IP rating too. This shows how well the charger resists dust and water. An IP67 rating is ideal. It means the charger is waterproof and can even be mounted on the cart. If you live in a rainy area or a dusty environment, this rating is essential.
Essential safety features include:
Reverse Polarity Protection: Prevents damage if you hook it up wrong.
Short-Circuit Protection: Cuts power if a wire is pinched.
Over-Voltage Protection: Stops the charge if the voltage spikes.
The Troubleshooting Roadmap: When Your Charger and Cart Disagree
Even with the right charger, problems can happen. It’s frustrating to plug in a new charger and see nothing happen. Most of the time, the charger isn’t broken. The issue is usually a safety feature that prevents it from turning on.
Smart chargers have a low-voltage lockout. If the battery voltage drops below 20 or 25 volts, the charger assumes something is wrong and stays off. This prevents sparks or fires.
You can fix this with a simple “wake-up.” Use a standard 12V car charger on each battery for 15 to 20 minutes. This raises the voltage enough for the golf cart charger to detect the batteries and start charging. Once it kicks in, it will finish the job safely. Use this for other common technical hitches:
What You See | What It Means | How To Fix It |
No lights at all | The charger has no power. | Check your wall outlet or the charger's fuse. |
Flashing Red Light | The batteries are too empty. | Boost individual batteries with a 12V charger. |
Rapid Clicking | A loose or dirty connection. | Clean the charging port with a wire brush. |
Fan keeps stopping | The charger is getting too hot. | Move it out of the sun or away from walls. |
Frequently Asked Questions (FAQs)
Still have a few nagging worries? You are not alone. We compiled the most common questions from this Golf Cart Charger Compatibility Guide to clear up any confusion:
Can I use a 48V charger on a 36V cart?
No. Using a 48V charger on a 36V system is dangerous. It will cook your batteries and ruin your cart's electronics. Always match the voltage exactly. This keeps your ride safe and your battery pack healthy for years to come.
How do I find my cart's voltage?
Count the water caps on one battery. Each cap equals two volts. Multiply that by the total number of batteries. For example, six batteries with four caps each make a 48-volt system. You can also check the stickers on the battery casing.
Can I use a lead-acid charger for lithium batteries?
Never do this. Lithium batteries need a specific "brain" to charge safely. A lead-acid charger uses stages that can cause lithium cells to catch fire. Always use a charger designed specifically for lithium setups to protect your home and your investment.
My charger won't turn on. Is it broken?
Not necessarily. Most smart chargers need to "see" a minimum voltage to start. If your batteries are totally flat, the charger stays off. Try charging each battery for ten minutes with a 12V automotive charger to wake the system up.
What is the best amperage for my charger?
For most owners, 13 to 15 amps is the sweet spot. This range charges your cart overnight without creating too much heat. High-amp chargers are faster but can shorten lead-acid battery life. Slow and steady is usually the best path forward.
Why does my plug shape matter so much?
Plugs act like keys. Each brand uses a unique shape to prevent you from using the wrong voltage. Forcing a plug can melt your charging port or cause a fire. Always match the connector shape to your cart’s receptacle for a safe handshake.
Conclusion: Enjoy a Reliable Ride with Total Charging Confidence
Hopefully, all your golf cart charger compatibility issues are gone now. You learned why generic chargers are risky and how easy it is to damage an expensive battery set. That uncertainty is behind you.
Now you know how to count caps, check plugs, and why smart chargers are better than simple timers. You’re no longer guessing. Informed choices for your cart and your family are at your fingertips.
Remember, don’t wait until your cart dies on the fairway. Go to your garage, lift the seat, and do your first compatibility check. Verify your volts and plugs. Once you have those numbers, you can order a new charger with complete confidence. Your cart will be ready for every adventure. Happy driving!