UTV Battery Disconnect Switch: The Small Switch That Saves Big Trouble
A UTV battery disconnect switch is one of the smartest upgrades you can make. It stops your UTV battery from draining while the machine sits parked. Riders who add one never worry about dead batteries again.
Most of us only notice the battery when it is already dead. That means a ruined ride day or an expensive replacement. A simple battery disconnect stops that from happening before it starts.
This guide explains what the switch does and how parasitic drain works. You will also learn how to install one and what to buy. Everything is covered from start to finish.
What Is a UTV Battery Disconnect Switch?
A UTV battery disconnect switch cuts all power between your battery and the machine. When you flip it off, zero current flows to any part. No ignition, no accessories, and no ECU power at all.
The switch sits inline on your negative cable. It physically opens the circuit, so no electricity can pass through. Unlike a fuse or relay, it is a complete break in the wire.
This is not a complicated device. It is one of the most reliable tools in off-road maintenance. Flip it off, and your battery is fully protected from that moment on.
How a Battery Disconnect Switch Works
A battery disconnect switch works by physically breaking the main circuit between your UTV battery and the electrical system. When the circuit is open, nothing can pull power from the battery. Here is exactly how the whole process works, step by step.
Step 1: Flip the switch to OFF. The switch opens the circuit right away. No current can travel from the battery to any part of the machine. Everything loses power instantly.
Step 2: Your battery holds its full charge. With the circuit open, phantom drain from accessories stops completely. Your UTV battery stays at full strength during storage. This works whether the machine sits for a day or an entire winter.
Step 3: Flip the switch back to ON. The circuit closes again in an instant. Full power returns to all components right away. There is no delay and no reset required.
Step 4: Start your UTV normally. The engine fires up just like it always does. The whole process from flip to start takes about two seconds total.
Some accessories, like GPS units or stereos, will lose saved settings when power is restored. This is completely normal and is not a sign of any damage. Keep that in mind after your first install.
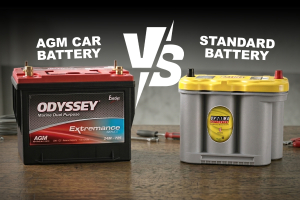
Battery Disconnect vs. Kill Switch vs. Battery Isolator
These three terms get mixed up all the time. They are related, but each one does something different. Here is the quick breakdown:
A kill switch cuts power to the ignition or engine. It stops the motor but not the full electrical circuit.
A battery isolator keeps two batteries from draining each other. It is used in dual-battery setups.
A battery disconnect cuts the entire main circuit on a single battery. Everything loses power the moment it is flipped off.
For most UTV owners, a simple battery cutoff switch covers all the bases. It handles storage protection, anti-theft protection, and safe maintenance in one device. You get three real benefits from one small and inexpensive upgrade.
Why Your UTV Battery Keeps Dying (And How This Switch Fixes It)
Your UTV battery keeps dying because something pulls current from it all the time. This happens even with the key fully out of the ignition. It is called parasitic drain, and it is the number one cause of dead powersport batteries.
A battery disconnect switch is the cleanest fix you can make. It kills that draw by completely breaking the circuit. No current path means zero battery drain, every single time.
What Is Parasitic Drain on a UTV?
Parasitic drain is current that keeps flowing after you turn off your UTV. A healthy vehicle should draw under 50 milliamps in standby mode. Anything above that threshold will kill your battery within days or weeks of sitting.
Modern UTVs are packed with electronics and popular aftermarket upgrades. Every single one contributes to battery drain when you are not riding. Here are the most common sources of parasitic draw on a UTV:
GPS units and trail cameras draw standby current all the time to keep their connection alive.
LED light bar controllers never fully shut down between rides.
Stereos and amplifiers stay partially active even with the ignition fully off.
Winch controllers hold a low-level draw to stay ready for operation at all times.
ECU modules need standby power to keep memory settings and fuel trims active.
Faulty wiring or failing switches that do not close properly create constant invisible draws.
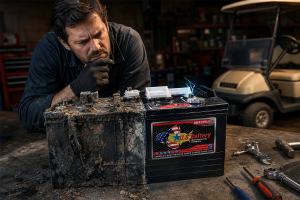
A healthy lead-acid battery can handle normal standby draw for about two to three weeks. Park your UTV for a full month, and it comes back dead almost every time. Phantom drain from those accessories is what finishes the job, not the battery itself.
That damage also goes deeper than just a flat battery. When a lead-acid battery sits fully discharged for too long, sulfation sets in. The plates develop a coating that permanently reduces how much charge the battery can hold, and no charger fully reverses it once it starts.
How a Disconnect Switch Stops Battery Drain
A battery cutoff switch breaks the circuit the moment you flip it off. No current can reach any component after that point. Standby current and phantom drain drop to zero. Sulfation risk from parasitic discharge is also greatly reduced.
This is the most reliable solution for off-season storage or any break of over a week. Flip the switch off and walk away. Come back weeks later to a battery that is still fully charged.
A trickle charger is a smart addition for storage periods over two months. But the disconnect handles parasitic drain completely on its own. Most riders find they no longer need a charger for normal seasonal breaks.
5 Reasons Every UTV Owner Needs a Battery Disconnect Switch
Here are five solid reasons to add one today. Each one saves you time, money, or frustration on the trail. You probably only need one of them to make up your mind.
1. Stops parasitic battery drain. Phantom drain from accessories is the top killer of UTV batteries. A battery disconnect cuts that problem at the source, not the symptom.
2. Extends battery life. A battery that never fully discharges lasts much longer. You avoid sulfation damage that permanently reduces capacity in lead-acid batteries.
3. Adds anti-theft protection. No power means no easy start for a thief. A hidden master switch is cheap and genuinely effective as a deterrent.
4. Makes maintenance safer. Working on wiring with the UTV battery fully isolated removes all risk. No sparks, no accidental shorts, and no stress.
5. Saves real money. A quality battery switch costs $20 to $50. A replacement UTV battery runs $60 to $150 or more.
Riders who also upgrade to efficient UTV batteries that are built for off-road demands get even more out of their switch. That combination gives your machine a strong and reliable foundation. Both together keep your UTV ready to start every single time.
Types of UTV Battery Disconnect Switches Explained
Switch Type | Best For | Continuous Amps | Standby Draw | Anti-Theft | Price Range |
Manual Knob/Dial | Most UTV owners | 100A to 500A | Zero | Moderate | $15 to $40 |
Keyed Battery Disconnect | Shared storage, security-focused riders | 100A to 400A | Zero | Strong | $25 to $60 |
Remote Control Disconnect | Frequent riders, daily convenience | 200A to 360A | Under 5mA | Strong | $40 to $100+ |
Not every disconnect switch is built the same. The right type depends on your setup, riding habits, and security needs. There are three main types for UTV owners to choose from.
Use this table as a quick guide before you start shopping. It saves you from buying the wrong type for your specific setup.
Manual Knob or Dial Switch
This is the most common type of battery disconnect available. You turn a knob to cut or restore power. It is simple, affordable, and completely reliable.
Most manual switches handle between 100 and 500 amps. They mount on the battery post or inline on the negative cable. This is the best starting point for most UTV owners.
The main downside is physical access. If it ends up buried under panels, you will stop using it fast. Plan your mounting location before you buy anything.
Keyed Battery Disconnect Switch
A keyed battery cutoff works exactly like a door lock. Insert the key to power on and remove it to cut all power. Without the key, the UTV simply cannot start.
This type adds real anti-theft protection to your machine. You carry the key, and no one else can power the UTV. It is popular for riders who store UTVs in shared or open spaces.
Most keyed models come with two or three copies in the box. Always store a spare somewhere consistent and easy to find. Losing the only key means no riding until a replacement shows up.
Remote Control Battery Disconnect
A remote battery switch lets you cut or restore power without touching the machine. You use a key fob or a smartphone app. No physical access to the switch is needed at all.
Remote switches draw a small standby current to stay active. This is usually under 5 milliamps and is far too small to affect your UTV battery during storage. You will not notice any impact on battery life from it.
This is the most convenient option for frequent riders. It is also the most expensive of the three types. The tradeoff is absolutely worth it if you ride regularly and want easy access.
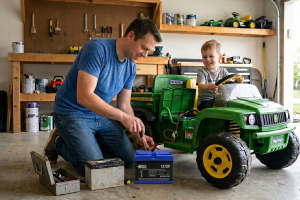
How to Install a UTV Battery Disconnect Switch: Step by Step
Installing a UTV battery disconnect switch takes most riders 30 to 60 minutes. You do not need special skills or shop tools. The key is planning your cable cut and mount point before you touch anything.
Tools and Materials You Need
Having the right tools ready before you start makes the whole job go smoothly. There is nothing worse than stopping halfway through because a crimping tool is missing. Take five minutes to gather everything on this list before you even open the battery box.
UTV battery disconnect switch with included mounting hardware
Basic wrench set (8mm and 10mm cover most UTV terminals)
Wire cutters and wire strippers
Crimping tool and ring terminals, if not included with the switch
Electrical tape or heat shrink tubing
Drill and drill bit for mounting the switch body, if needed
Silicone caulking to weatherproof the wire connections (optional but smart)
Pick your mounting location before cutting any cable. The switch must be easy to reach and away from heat sources and moving parts. Under the seat near the battery terminals is the most popular and practical spot.
Step-by-Step Installation Guide
Step 1: Turn the UTV completely off and remove the key from the ignition. Never work on battery wiring with any power present. Give the system about 30 seconds to settle before you touch anything.
Step 2: Disconnect the negative terminal from the battery first. This is the black cable marked with a minus sign. Disconnecting the negative side first prevents accidental shorts to the frame.
Step 3: Decide exactly where you will cut the negative cable. The battery disconnect goes inline between the battery and the frame ground. Cut the cable cleanly at that chosen point.
Step 4: Strip the insulation on both cut ends of the cable. Attach ring terminals if your switch requires them. Connect each cable end to the two terminals on the switch.
Step 5: Mount the switch securely using the provided hardware. It must not move or rattle during hard trail riding. A loose switch wears out its internal connections faster than you would expect.
Step 6: Reconnect the negative terminal to the battery. Flip the 12V switch to the ON position. Start the UTV and confirm everything runs normally before moving on.
Step 7: Test the battery disconnect by flipping it to OFF. Try to start the UTV and confirm nothing happens. Flip it back to ON, start the machine, and you are done.
A solid install takes about 45 minutes on the first attempt. Take your time on the cable cuts and terminal connections. Rushing those two steps is where most problems come from.
What to Look for When Buying a UTV Battery Disconnect Switch
The right UTV battery disconnect switch comes down to five key specs. Cheap switches miss at least one of them. That miss will cost you more than whatever you saved on the purchase price.
When choosing a disconnect switch, look for a continuous amperage of at least 200A. This ensures it handles your daily power needs without getting too hot. You should also check that it handles a peak cranking amperage between 400A and 1000A to manage the surge when starting your engine.
Make sure the switch is compatible with your UTV's electrical system. Most UTVs use a 12V system, while some support 12V to 48V applications. Because UTVs often encounter mud, water, and rain, choose a switch with at least an IP67 waterproof rating. An IP68 rating provides even better protection in harsh off-road conditions.
Choose a switch made of brass or copper to prevent rust and keep the electricity flowing well. Always plan to install the switch on the negative terminal for better safety. This setup is much safer than connecting it to the positive side.
Amperage Rating: The Most Important Spec
Amperage is the most important number on any battery disconnect switch. A UTV starter motor pulls 200 to 400 amps during a cold start. Your switch must handle that surge without overheating or arcing.
Always look at two separate numbers before buying. The first is continuous amperage for normal running loads. The second is peak or cranking amperage for the startup surge.
Many budget switches only list continuous amperage on the label. A switch rated 100A continuous fails the moment your starter demands 300A. Read the full spec sheet every time, not just the number printed on the box.
Waterproof Rating for Off-Road Use
UTVs go through mud, water crossings, and hard rain on a regular basis. A switch without a proper waterproof rating corrodes internally within one riding season. This spec is not optional for any off-road machine.
Look for IP67 at a minimum on any waterproof disconnect switch used for off-road battery protection. IP68 handles deeper submersion and is the better choice for serious trail riders. Never confuse water-resistant with waterproof. Those are two very different standards.
Water-resistant handles splashes only. Waterproof means it survives full submersion. The gap between those two ratings matters a lot in real off-road conditions.
Contact Material: Brass vs. Copper
Brass and copper are the right contact materials for a quality battery switch. Both resist corrosion and handle high current without building up resistance over time. Switches with aluminum or steel internals fail faster in wet and muddy conditions.
Always look for the contact material listed clearly in the product specs. If the listing does not mention it, that is usually a sign of a cheaper and less reliable build. Spending a few more dollars on the right contact material is always worth it.
Positive vs. Negative Terminal Installation
Almost every manufacturer recommends installing it on the negative terminal. If a tool accidentally touches a grounded surface during the install, nothing happens. This is the safe and standard method across all vehicle types.
Installing on the positive terminal carries more risk. A positive cable touching any grounded metal surface creates a short. Always go negative for safety and simplicity.
Some switches work on either terminal. Others are designed for one side only. Always check the product description before buying to avoid a frustrating and costly mistake.
Common Mistakes UTV Owners Make With Disconnect Switches
These are the most common errors riders make with their switches. Knowing them now helps you avoid the same problems. Each one is easy to prevent with a few minutes of preparation beforehand.
Wrong amperage rating. Always check peak cranking amperage, not just the continuous number on the box. A switch that is too small will arc and burn out fast under load.
Hard-to-reach mounting spot. A switch you cannot reach in three seconds is one you will stop using. Mount it somewhere accessible before you run the wiring.
No waterproof rating. Always use a rated IP67 waterproof switch on any off-road machine. Standard automotive switches corrode within one season on a UTV.
Forgetting the electronics reset. GPS units, stereos, and clocks lose their saved settings when power is cut and restored. This is completely normal behavior and not a sign of any damage.
Installing on the positive terminal. Always go on the negative terminal. It is safer and works exactly the same way.
Ignoring contact material. Look for brass or copper contacts stated clearly in the product spec sheet. Anything else corrodes faster and underperforms under real load conditions.
Every one of these mistakes is avoidable before you buy. Run any switch you consider through the buying checklist table above. That one step eliminates most bad purchases before they happen.
Frequently Asked Questions About UTV Battery Disconnect Switches
These are the questions UTV owners ask most before their first switch purchase. Every answer below comes from real hands-on experience with off-road setups.
Does a battery disconnect switch drain the battery itself?
No. A manual or keyed cutoff switch draws zero power in the off position. A remote battery switch draws under 5 milliamps in standby, which is far too small to matter.
Can I use a battery disconnect switch on a UTV with a lithium battery?
Yes. A battery disconnect switch works the same on both lead-acid batteries and lithium batteries. Just match the amperage rating to your UTV starter specs before buying.
Will a disconnect switch damage my UTV's electronics?
No. Cutting and restoring power is safe for all standard UTV electronics, including the ECU. Some accessories like GPS or stereos lose saved settings, but that is not damage.
How often should I flip the disconnect switch?
Flip it off any time your UTV sits for more than a week. Daily riders do not need to flip it after every single ride.
Where is the best place to mount a disconnect switch on a UTV?
Install it inline on the negative cable close to the battery. Under the seat or near the battery box are both reliable choices.
Do I need a fuse when installing a battery disconnect switch?
No extra fuse is needed for the switch itself. Your existing fuse box still protects the circuit, and the battery cutoff switch serves a completely separate function.
Can a battery disconnect switch prevent UTV theft?
Yes. No power means no start, which stops most opportunistic thieves right away. A hidden master switch works best alongside a cover or cable lock.
What amperage disconnect switch do I need for a UTV?
Look for at least 200A continuous and 400A to 1000A peak cranking capacity. Most UTV starters pull 200 to 400 amps during a cold start.
Does disconnecting the battery reset the ECU on a UTV?
Some ECU modules lose short-term memory but not core programming when power is cut. Your UTV may run slightly rough for a few minutes until it relearns fuel trims on its own.
Should I use a trickle charger alongside a battery disconnect switch?
You do not need one for storage breaks under two months. For longer storage, running both together gives you the best battery longevity and keeps the pack at peak charge.
Get the Right Switch and the Right Battery
A UTV battery disconnect switch protects your machine the moment you install it. But it only works as well as the battery behind it. A weak or sulfated battery will still fail no matter what.
If your current battery has taken repeated hits from deep discharge, replacing it makes more sense than hoping for the best. A new battery paired with a battery disconnect switch is the cleanest long-term solution available. That combination gives your UTV the best shot at starting strong every single time.