Golf Cart Charger Not Working? Common Causes and Fixes
You plug in your golf cart charger, but nothing seems to happen. The battery level doesn’t move, and the cart still feels like it isn’t charging at all. That can get frustrating fast, especially when you rely on it for daily use.
Sometimes the cart struggles to run the next day, even after being left on charge overnight. Other times, the batteries drain faster than usual. But the problem is not always the charger itself.
It could be weak or old batteries, loose or corroded connections, a blown fuse, or even a faulty outlet. Even a small issue in the circuit can stop the whole system from working properly.
Understanding why a golf cart charger is not working helps you narrow down the cause and find a faster, easier fix.
The Fundamental Logic of Golf Cart Charging Systems
Before you start pulling wires, it helps to understand how these machines communicate. A golf cart charger is not like a phone charger. It does not instantly deliver power the moment it is plugged in. Instead, it waits for a signal from the battery pack.
If the batteries are too low, they may not be able to send that signal, so the charger never activates. From the charger’s perspective, nothing appears to be connected at all.
This handshake is an important safety feature. It prevents sparks, reduces the risk of damage, and protects the charger’s internal electronics. Most chargers are designed to look for a minimum voltage before they wake up. When a 48-volt system drops too low, such as around 30 volts, the charger may remain completely silent. It is not necessarily broken. It is often waiting for the batteries to recover enough voltage to respond.
Preliminary Diagnostic Checklist
Before moving into advanced troubleshooting, start with a few basic checks. Many charging issues come down to simple power, connection, or safety interruptions.
First, confirm the outlet is working by plugging in a lamp or small device. Check the breaker panel if there is no power, and avoid using thin extension cords, which can reduce voltage.
Next, inspect the charger plug and receptacle for damage, corrosion, or loose connections, and clean contacts if needed.
Finally, reset any tripped breakers on the charger and test the cart-side fuses with a multimeter to ensure proper continuity.
Battery-Related Obstacles to Successful Charging
Your batteries are the core of the system. If they are weak or neglected, the charger cannot do its job. When batteries stop cooperating, it usually comes down to a few common issues.
One of the most common problems is deep discharge. If a golf cart sits unused for months, even with impact-resistant cart batteries, it will slowly lose charge on its own. Eventually, the voltage can drop below the level needed for the charger to turn on. In this case, the charger may seem broken, but it is simply not detecting the battery pack. A temporary boost with a 12-volt charger on each battery can raise the overall voltage enough for the main charger to start working again.
Another issue is corrosion on the battery terminals. Even a light layer of white or green buildup can block current flow and create high resistance. This acts like a barrier between the charger and the battery. Cleaning the terminals with a baking soda and water mix, scrubbing them until the metal is clean, and tightening the connections properly can restore proper charging. Loose or dirty connections often create heat and lead to charging failure.
Low electrolyte levels can also prevent proper charging. Lead-acid batteries rely on a mix of water and acid to function. If the water level drops and the plates are exposed, the battery can become damaged and resist charging. Always use distilled water and keep the level just above the plates without overfilling.
Troubleshooting Manufacturer-Specific Systems
Every brand has its own quirks. A Club Car does not think like an EZGO. Knowing the specific "brain" of your cart helps you find the problem faster. Let's look at how the big three brands handle their charging.
Club Car: The On-Board Computer (OBC) System
Club Car models made between 1995 and 2014 use an On-Board Computer (OBC). This little box is a smart middleman. It tracks how much energy you use and tells the charger exactly when to stop.
Symptoms of a Failing OBC
If your OBC is failing, your charger might not turn on at all. Or, it might turn on but stay on forever, cooking your batteries. Sometimes the cart will refuse to move even if it is unplugged because the OBC thinks the charger is still connected. This is a safety lockout. If you see these signs, the OBC is likely the culprit rather than the charger itself.
Procedure for Performing an OBC Reset
You can often fix an OBC by resetting it. This is like rebooting your computer when it freezes.
Turn the key to "Off."
Set the Forward/Reverse switch to "Neutral."
Disconnect the main negative wire from the battery pack.
Put the cart in "Reverse" and lock the buzzer on.
Wait for the buzzer to die out.
Reconnect the battery.
Sometimes this simple reset is all it takes to wake the system back up.
EZGO: Powerwise and Delta-Q Diagnostics
EZGO carts often use Powerwise or Delta-Q chargers. These are generally reliable but have very specific ways of telling you what is wrong.
Interpreting LED Fault Codes on Delta-Q Chargers
Modern EZGO chargers use a single LED light that flashes in patterns. These are fault codes. Instead of guessing, you can read the blinks to find the error.
Blink Pattern | Meaning |
1 Red Flash | Battery voltage is too high. |
2 Red Flashes | Battery voltage is too low. |
3 Red Flashes | Charge timeout (took too long). |
4 Red Flashes | Battery temperature is too high. |
6 Red Flashes | Internal charger fault. |
If you see six flashes, the charger probably has a blown internal component. If you see two flashes, your batteries are likely too dead to start the cycle.
Yamaha: Identifying Control Board and Relay Failures
Yamaha chargers are known for their simplicity. However, they often suffer from relay failures. You should hear a distinct click about three to five seconds after plugging it in. This click is the internal relay closing the circuit. If you plug it in and hear nothing, the relay or the control board that triggers it is likely dead. You can often buy these boards separately for a fraction of the cost of a new charger.
Internal Component Failure Analysis For Not Working Chargers
If you have checked the batteries and the plugs and everything looks good, the problem is likely inside the charger box. Most traditional chargers are built with a few main parts, and each one can be tested.
Testing the Rectifier and Diode Assembly
The rectifier is the part that converts AC power from your wall into DC power for the batteries. Inside it are diodes, which act like one-way gates for electricity. If a diode fails, the charger may hum but produce no output, or it may blow a fuse right away.
You can test diodes with a multimeter on the diode setting. A good diode shows a reading in one direction and “OL” in the other. If it shows a reading both ways, it is shorted and needs replacement.
Identifying Faulty Control Boards and Timers
The control board is the brain of the charger. It decides when the charging process starts and stops. If it fails, the charger may not turn on at all. Check for burn marks, damaged components, or a burnt smell. Power surges, especially from lightning, can damage capacitors on the board. In most cases, a faulty board is replaced rather than repaired.
Relay Switch Failures and Audible Indicators
The relay is the mechanical switch inside the charger that usually makes a clicking sound when it activates. If it sticks open, power never reaches the batteries.
If it sticks closed, the charger may run continuously and overheat. You can test it by applying the correct trigger voltage to the control pins. No click usually means the relay is bad.
Transformer Continuity and Voltage Output
The transformer is the large copper-wound component that steps voltage up or down. It is rarely the first point of failure, but when it does fail, the charger often cannot be repaired economically. You can check it with a multimeter by testing continuity through the windings. If there is no continuity, the transformer is no longer functional.
Step-by-Step Testing Procedures with a Multimeter
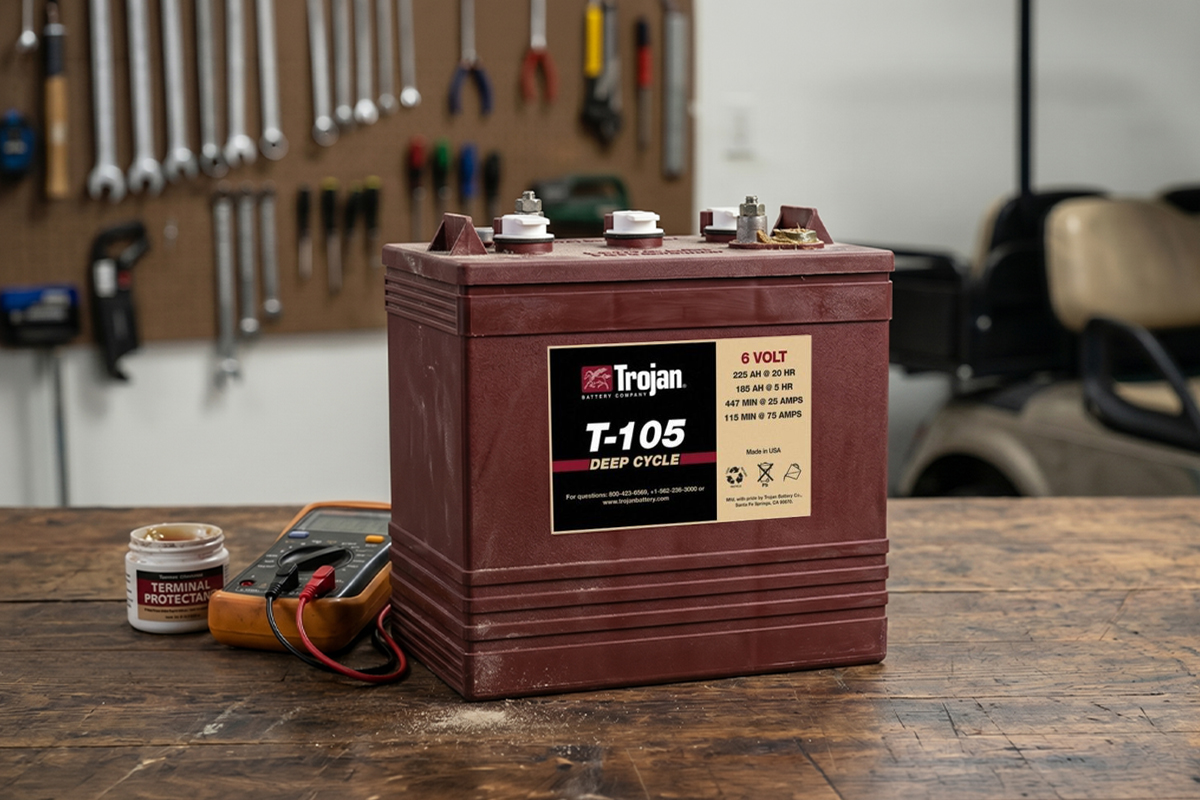
A multimeter is one of the simplest and most useful tools for finding charging problems. A basic digital one is enough. Always set it to DC voltage when checking batteries.
Step 1: Measure Total Pack Voltage and Individual Batteries
Start by checking the full battery pack. Place the red probe on the first positive terminal and the black probe on the last negative terminal. This shows the total voltage of the system and gives a quick idea of overall battery health.
Next, check each battery one at a time. A healthy 6-volt battery should read about 6.3 volts, and an 8-volt battery around 8.4 volts. If one battery is much lower than the rest, that battery is likely weak or failing and can pull the whole system down.
Step 2: Test the DC Output Cord for Continuity
Charger cords can break inside without showing any visible damage. Set your multimeter to continuity mode. Touch one probe to a plug pin and the other to the matching wire at the charger end. If there is no beep, the wire is broken. This is often fixed by replacing the plug or trimming and repairing the cord.
Step 3: Check Charger Output Voltage
Some chargers only show output when connected to a cart, so this test is limited. Still, you can check voltage coming out of the charger side while it is plugged into the wall.
Be careful, as this involves live power. If voltage is leaving the charger but not reaching the plug, the problem is usually in the cord or connector.
Corrective Actions and Repair Protocols For Cart Chargers
Once you find the problem, it is time to fix it. Most golf cart repairs are straightforward. You just need a few tools and some patience.
Procedure for Manually Boosting a Discharged Battery Pack
If your batteries are too low for the charger to start, you must trick the system.
Get a standard 12-volt automotive battery charger.
Connect it to two 6-volt batteries or one 12-volt battery.
Charge for 15-20 minutes.
Move to the next set of batteries.
Once the total pack voltage is high enough, plug in your golf cart charger. It should hum to life immediately.
Bypassing the OBC for Diagnostic Validation
If you suspect your Club Car’s OBC is dead, you can bypass it to test the charger. You do this by connecting the gray "sense" wire from the charger receptacle directly to the main negative battery terminal using a jumper wire.
If the charger turns on with the bypass in place, you know the charger is fine, and the OBC is broken. Do not leave it bypassed forever. The OBC is what tells the charger to stop. Without it, you will cook your batteries.
Replacing Corroded Receptacle Pins and Wires
If your charging port is melted or green with corrosion, replace it. You can buy receptacle kits that include new pins and wires. Cut the old wires back until you see shiny copper. If the copper is black or dark, the corrosion has traveled up the wire. Keep cutting until you find clean metal. Good contact prevents fire hazards.
Long-Term Preventive Maintenance for Charging Systems
You don't want to do this again next year. A little bit of care goes a long way. Batteries are like pets. If you feed them and keep them clean, they will stay loyal.
Scheduled Cleaning and Connection Tightening
Every three months, pop the seat. Check every single nut on the battery terminals. Vibration from driving can loosen them. A loose nut creates resistance. This creates heat, which melts the terminal. Spray the terminals with a protector spray to keep the green fuzz away.
Proper Storage Procedures During Off-Season Periods
Never leave your cart unplugged for the winter. Lead-acid batteries self-discharge. If they stay dead in the cold, the liquid inside can freeze and crack the plastic case.
If your charger has a maintenance mode, leave it plugged in. If it doesn't, use a separate battery tender. Have someone plug the cart in once a month for a full cycle. This keeps the chemistry healthy.
Monitoring Battery State-of-Charge (SoC)
Install a digital voltmeter or a multimeter. It costs $15 and tells you exactly how much fuel is in your tank. Never let your batteries drop below 50% charge. For a 48-volt cart, 50% is actually 48.4 volts. If you wait until the cart is slowing down, you have already gone too low. Keeping them topped off makes them last years longer.
Frequently Asked Questions (FAQs)
You may still have questions, and that is normal. Here are the most common questions from cart owners, along with quick answers to help you move forward.
Why does the charger click but fail to deliver current?
This usually means the relay is working, but there is a break in the circuit elsewhere. Check the fuse in the charger and the fuse on the cart's receptacle. Also, check for a broken wire in the DC cord.
Is it safe to leave the charger connected indefinitely?
Only if it is a smart charger. Older chargers do not always turn off completely. They can trickle power into the battery until the water boils away. Check your manual. If it doesn't mention a float mode, unplug it once the needle hits zero.
What causes a charger to generate excessive heat during operation?
A small amount of heat is normal. If it is too hot to touch, you have a problem. This is often caused by low water in the batteries or a failing diode. It can also be caused by using an extension cord that is too thin.
Can a blown fuse in the cart prevent the charger from starting?
Yes. Most carts have a fuse on the charging circuit. If this fuse is blown, the batteries cannot send their wake-up signal to the charger. The charger will act like it isn't even plugged into the cart.
Can I jump-start my golf cart batteries?
Yes. If the voltage is too low for your charger, use a 12-volt car charger. Charge each battery for fifteen minutes. This raises the voltage enough for your main charger to wake up and take over the job.
Keep your cart ready for the next round
Working with golf carts is generally safe, but you are dealing with electricity and acid. Always wear eye protection. A single spark can cause a battery to explode if it is off-gassing hydrogen. Remove any metal jewelry or watches before reaching into the battery bay.
If you have followed this guide and still, your golf cart charger not working, it might be time to call a professional.
However, in most cases, the solution is simple. Take care of your cart, and it will take care of you. Now, go get back on the course and enjoy your game.